Thursday, November 16, 2006

Omitting the Byte Order Mark while saving XML Document

Have you every opened up an XML file in note pad and noticed those little gobbly gook characters preceding the XML declaration?  Well my friend you have encountered the ever elusive Byte Order Mark, or BOM for short.  I prefer Byte Order Mark because BOM sounds dirty, kind of like scrum.  Eck, dirty. 

The Byte Order Mark is basically three characters that are added to the beginning of xml files to denote their encoding.  I know... I know...  You can declare the encoding in the xml declaration.  That's what it is there for, right?  To declare stuff. 

Well, that is only partly true.  When an XML parser reads an XML file, the W3C defines the following three rules to decides how the document should be read:

  1. If there is a Byte Order Mark the Byte Order Mark defines the file encoding.
  2. If there is no Byte Order Mark, then the encoding attribute in the XML declaration is definitive.
  3. If there are neither of these, then assume the XML document is UTF-8 encoded.

I think that I remember reading an article once that claimed the Byte Order Mark was born out of Windows NT, but I can't find it now.  Either way, you are bound to come across some service somewhere that doesn't like it, probably because the service thinks that it is dirty.  All strings in .NET are encoded to UTF-16 by default. If you build and XmlDocument and save it, it will be UTF-16 encoded.  And by default, there will be a silly little Byte Order Mark.  Visual Studio, like most current xml editors, won't show it to you, but its there. 

Here's how I prevent the Byte Order Mark from appearing in my generated xml files.

public void WriteXmlFile(XmlDocument xdoc)
{
System.Text.Encoding enc = new UTF8Encoding(false);
XmlWriter w = new XmlTextWriter("NewFile.xml", enc);
xdoc.Save(w);
w.Close();
}


When I create the UTF8Encoding object, I pass in false for the encodingShouldEmitUTF8Identifier parameter.  This will omit the Byte Order Mark from the NewFile.xml file. 
Tuesday, November 07, 2006

Parsing CSV files with PowerShell

So there I was, looking at a Caliber requirement, basically a Word document, with a table of values that needed to get into a table in our SQL database.  We were still in development and there was no entry form in the application for the requirement writers to enter the values.  Faced with the prospect of having to manually build a sql script to insert all these values, I desperately called out to Necessity.  You know that Necessity is the mother of invention.  She carries a big purse full of invention, with which she immediately hit me over the head.  She told me that I already had Powershell, mumbled something about the boy that cried wolf and stormed out.  Powershell, eh?  The following is an abbreviated description of what I did to generate my sql script. My insert statement was much larger.

First, I copied the word table into excel, including the headers, and saved the file as a CSV file. The format looked something like this:

State, City, Type

GA, Atlanta, AB

GA, Albany, A

Now for the Powershell.  Check out this bad boy:

Import-Csv Test.csv | % { "INSERT INTO refTestTable (State, City, Type) VALUES ('$_.State', '$_.City', '$_.Type')"}  >> "Test.sql"

After opening up the new Test.sql file, I got this:

INSERT INTO refTestTable (State, City, Type) VALUES ('GA', 'Atlanta', 'AB')
INSERT INTO refTestTable (State, City, Type) VALUES ('GA', 'Albany', 'A')


Not bad for one line of code.  Powershell's Import-Csv command loops through all the records in the CSV file and generates objects.  Then for each object we build a sql string and insert the object's properties.  Notice how the properties were dynamically generated so all you had to do was call them?  Finally, I outputted the resulting string to a text file.  Using this method I was able to generate and run the sql script in less than 10 minutes. 


Monday, November 06, 2006

My first blog from Live Writer

This is my first blog post that I have generated in Windows Live Writer Beta.  Until now, I have used the online editor.  The fat client sports a cool WYSIWYG editor and a lot of great accelerator keys.  Publishing is a snap and seems to take less time compared with the web editor.

The team has provided an SDK and encourages the development of plugins.  There is a page dedicated to these here.  I found a neat one that helps insert code snippets.  Insert Code for Windows Live Writer supports C#, HTML, MSH, JavaScript, Visual Basic and TSQL.  I wish that there was a way to assign accelerator keys to the plugins.  For now, I'll just have to go through the menu.

Friday, November 03, 2006

Portable App Week - FastStone Capture

We've come to end of Portable Apps Week and I'm a little sad. But all good things must come to an end. For my last app of the week, I'm going back to FastStone and their Faststone Capture utility. Capture is a screen capture utility that lets you easily capture anything on the screen including windows, objects, full screen, rectangle regions, freehand regions, and scrolling windows. It comes with an editor that allows for cropping, adding text, highlighting and drawing. Not bad for 1.2MB. It's what I've been using to generate the images for all of this week's previous posts.

I know what you're thinking. How does this compare with Snagit. Well, it isn't quite as full featured as Snagit. It doesn't do text capture, menu capture or video capture. It does allow for freehand capture regions. I'm not sure if Snagit has that or not. FastStone Capture has a much smaller footprint than Snagit. Hmmm, what else? Did I mention that it was free?

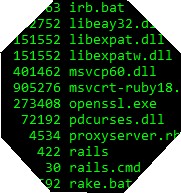
Here is a capture I did freehand. It is supposed to be an octogon.

Thursday, November 02, 2006

Portable App Week - FastStone Image Viewer

When someone asks me to help them with their website, I have to remind them that I'm a developer, not a graphic artist. As a developer I strive to make pretty things, but I have no formal artistic training. I had a really good friend that was a professional graphic artist. His firm did work for Coke and Six Flags. I probably could have learned a lot from him, had my girlfriend at time not dumped me and ran off and married him.

Happy place, go to your happy place.

I am a big fan of the gimp. It's open sourced, free, powerful and difficult to learn. It's also really big and takes a long time to load. Since I spend most of my time editing pictures of the kids, removing red-eye and cropping, I don't always need the power of the gimp. So I was excited to find FastStone's ImageViewer.

"FastStone Image Viewer is a fast, stable, user-friendly image browser, converter and editor. It has a nice array of features that include image viewing, management, comparison, red-eye removal, emailing, resizing, cropping and color adjustments. Its innovative but intuitive full-screen mode provides quick access to EXIF information, thumbnail browser and major functionalities via hidden toolbars that pop up when your mouse touch the four edges of the screen. Other features include a high quality magnifier and a musical slideshow with 150+ transitional effects, as well as lossless JPEG transitions, drop shadow effects, image annotation, scanner support, histogram and much more. It supports all major graphic formats (BMP, JPEG, JPEG 2000, animated GIF, PNG, PCX, TIFF, WMF, ICO and TGA) and popular digital camera RAW formats (CRW, CR2, NEF, PEF, RAF, MRW, ORF, SRF and DNG)."


It's practically microscopic(3MB) compared to the gimp(40MB) and its fast. The full screen mode is really cool and intuitive, once you get the hang of it. There are a ton of shortcut keys that make browsing a little easier. Red eye removal and rotation are a snap. The cropping feature is cool because it allows for you to set the crop size to monitor resolutions. Great for getting a picture of my daughter in her bumble-bee costume for my wallpaper. It comes with dual monitor support, so you can do full screen on one monitor and look at the image viewer on the other. It will even let me link to an external program, if I want to edit the image in something more powerful.

And don't forget, this is a portable app. There are no ties to the registry. So next time you take your USB drive over to your parent's house to show them the pictures you just took of the grandkids, you'll have a great image viewer to view them in.

Wednesday, November 01, 2006

Portable Apps Week - FolderSize

It's an all to familiar proplem. Your favorite drive (HDD, USB, etc.) has filled up and you need to make some space. So you go into explorer and pull up your drive. Explorer shows you a list of folders and now its up to you to figure out which one is taking up the most space. This means a lot of right clicking. Enter FolderSize from RoteBetaSoftware. What a great play on words.

Folder size gives you a graphical representation of the folder sizes. Take a look at my ruby installation. You'll quickly figure out that the 'lib' folder is far and away the largest folder in the directory. You can even click directly on one of the bars in the graph to drill down into sub folders. Its a neat little utility (333kb) that comes in handy from time to time.